Although it started out as a girls weekend, just my Great Grandma, Grandma, Mom, Me, my cousin Athena and my sister Lauren…once Nathaniel was born he started coming and then Athena moved away and stopped coming and then my cousins Nell and Lisa started coming and now this year it will be Nell and Lauren’s friend Jessica. On Saturday night we always have this 100% childish and completely fun “Halloween Party”. We make themed party food, have lots of sugar and dry ice and glow sticks are usually involved. It really can be a lot of fun. (Don’t judge me!)
My Grandma loves Halloween more than most people and she loves to decorate. So this year, while browsing JoAnns to feed my fabric addiction I found some Halloween fabric I fell in love with, but didn’t know what to do with. Then I had the bright idea to make my Maw Maw some placemats to use at the condo for our weekend. Lame, but she will flip out.
So, I finished them last night! My mom suggested I share the pattern with all of you blogsie readers….so here you go!!! You could totally use any fabric you wanted, change it up for different seasons and holidays and to match your décor.
Boo Baby Placemats

Makes 6 placemats
BUY:
Aprox 2 yards print fabric
Aprox 3 yards stripe fabric
3 yards 40 weight interfacing
Contrasting thread
CUT:
6 – 10”x 15” pieces from print fabric
12 – 10.5”x 2.5” pieces from the stripe fabric, making sure stripe is on the horizontal
12 – 19” x 2.5” same as above…or in other words stripe should be horizontal on the 2.5” side of the stripe
6 – 19”x 14” pieces from stripe fabric for backing. Or, you could also buy more printed and use that for the backing.
**All of these dimensions allow for a 1/4" seam allowance!**

Basic directions:
1. Pin 2 of the shorter stripes to the short side of the 10”x 15” piece. Sew and press seams open. **All of these dimensions allow for a 1/4" seam allowance!**
2. Pin and sew 2 of the long, 19”x 2.5” strips to the top and bottom. Press seams open.
3. Pin the backing to the front (right sides together as always) start on short end, about one inch from corner and sew around other 3 sides then stopping about an inch in from the other side. You need to leave the 4th side open to slip in the interfacing to make the placemat stiff. (if this is confusing see my little lame illustration) Turn inside out and press.
 4. Cut one piece of interfacing aprox size 18.5”x 13.5”. Slip into the opening and then sew closed using your desired method. I used a hidden stitch or disappearing stich…but you could also whip stitch or whatnot.
5. Set your machine to the double zig zag stitch. (If your machine has that setting) basically it just does each zig and zag twice so it is thicker. (it just stands out better) Follow the border of the seam around the middle 10”x15” pattern piece.
6. Snip all your loose threads and press!
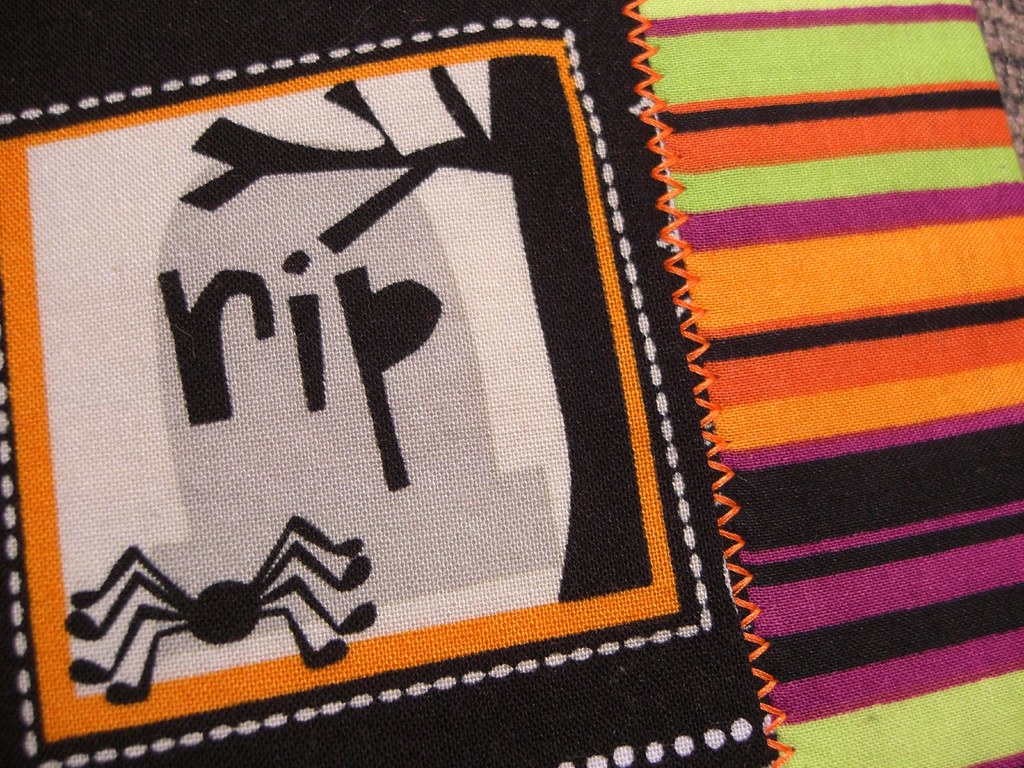

Voila, you have a gorgeous placemat!!
Tips:
Use a straight pin to pick out your corners before your press. Then the corners of your placemat will be nice and pointy!
You may need a heavy duty needle to sew through the interfacing, depending on what weight you get. I did not have any heavy duty needles, so I used a regular duty needle, but I put a fresh one in, so it was nice and sharp.
When zig zagging around the center panel, leave the needle in the fabric and turn. This way your zig zag will be one continuous stitch, it will look better and your will have less threads to hide!
I hope you all enjoy this pattern! Its just a basic Log Cabin type quilting method (thanks for teaching me that Mom!)
Feel free to use it however you wish! If you decide to make them to sell, all I ask is you give me credit for the pattern creation and a link to my blog would be great! (but not required)
Happy sewing!!


No comments:
Post a Comment